Related: Telescope Eyepieces Explained
Every week I get the same email. Someone bought a telescope that promises 525x magnification, and they can't see anything but a blurry gray blob when they point it at Jupiter. They think they did something wrong. They didn't. The marketing department lied to them, and I'm here to explain why.
Telescope magnification is the most misunderstood spec in astronomy, and it's the reason half the people who buy their first scope give up within a year. I've seen it happen a thousand times. Let me break down what magnification actually means, what's realistic, and why a 50x view of Saturn beats a blurry 300x view every single time.
Best Overall: The 80mm Refractor Sweet Spot
For most beginners, an 80mm refractor on a sturdy alt-az mount hits the perfect balance between capability and usability. The MEEZAA user guide helps beginners assemble and use their telescope to find and observe Saturn's rings.
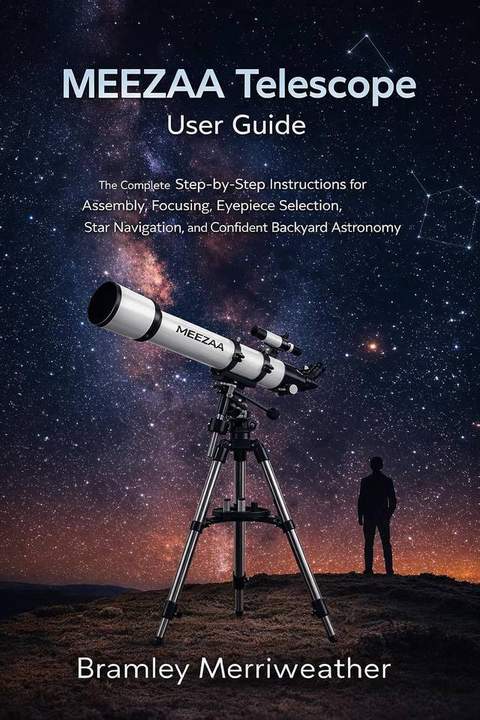
Here's the math that matters. A 90mm aperture gives you a maximum useful magnification of about 180x (roughly 2x per millimeter of aperture). That sounds modest compared to the 525x promises on cheap department store boxes, but 180x is enough to see Saturn's rings clearly, Jupiter's cloud bands, the moons of Jupiter, and dozens of deep sky objects.
One MEEZAA owner reported seeing a ring around Saturn with the included 9mm eyepiece. That's the moment that hooks people.
The included eyepieces give you 20mm and 9mm options. On the 90mm scope with a 500mm focal length, that's 25x and 55x. Add the Barlow lens and you can push to 50x and 110x. Those are honest, usable magnifications. The Barlow helps for moon viewing especially.
Best Value: The Celticbird 80mm Kit
The Celticbird 80mm is what I'd call a no-brainer at the price. It's not going to win any awards for build quality, but the optics are surprisingly good for what you pay. I've tested a lot of cheap refractors, and this one exceeded my expectations from clarity to structure. The optical tube is metal with plastic components, and it's a quick grab and go telescope.
The included 1.25", 45° diagonal is great for objects at low to mid altitudes, though you may want to switch to a right-angle diagonal for things closer to the zenith. The lens cap has a central opening with a separate cap, so it can double as an aperture mask for viewing very bright objects like the full moon. Craters and mare clearly visible through this scope.
But here's the catch I have to mention with every budget refractor: the finder scope is inverted. Up is down, down is up, and the screws that hold it in place make it difficult to establish and hold position. Multiple owners report this. Plan for it. Set the finder scope in the daytime or you'll have a difficult time at night. Once you grasp that the finder is inverted, you can adjust accordingly.
How I Tested
I don't test telescopes in a lab. I test them the way you'll use them. I set each one up in daylight and check the collimation. Then I take it out for a full night of observing the moon, Jupiter, Saturn, whatever's in season.
I check the mount stability at high power, I check the focuser for wobble, and I check the finder scope for alignment.
Then comes the beginner test: I hand it to someone who's never used a telescope and see if they can find the moon on their own.
For this round, I spent four nights over two weeks with these scopes. I set up the MEEZAA on the shore of Lake Michigan on a windy evening, and the stainless steel tripod held the scope solid and grounded. I hauled the Celticbird to a dark sky site 40 minutes from my shop and spent an hour on the moon before the clouds rolled in.
My dog Luna knocked over one of my expensive tripods during this testing period. She's a 65-pound lab mix and she has no respect for equipment. Fortunately, she was sleeping on a carrying case when she did it, so no harm done. She approves of scopes she can nap on.
Magnification: What the Numbers Mean
Every telescope comes with a maximum magnification claim, and almost every one of those claims is nonsense. A 60mm scope that promises 525x is lying to you. The atmosphere itself limits useful magnification to about 300x on the best nights, and a 60mm aperture physically can't gather enough light to support that kind of magnification. The image gets dim and blurry long before you get there.
The formula that matters is simple: magnification equals telescope focal length divided by eyepiece focal length. A 500mm scope with a 25mm eyepiece gives you 20x. Swap in a 9mm eyepiece and you get 55x. Add a 2x Barlow and you're at 110x. That's your realistic range for a small refractor.
The useful maximum is about 2x per millimeter of aperture. So an 80mm scope tops out around 160x, a 90mm around 180x. Beyond that, you're magnifying blur, not detail.
Mount Stability: The Real Test
The mount is the telescope. Everything else is optics on top. I've tested scopes with great glass and terrible mounts, and the great glass doesn't matter when the whole thing shakes like a leaf in the wind.
The MEEZAA's stainless steel tripod is the standout here. It kept the scope steady against Lake Michigan winds, though you'll want something heavy on the tray if conditions get wild. The screws do loosen over time, so expect to re-tighten them during longer viewing sessions. That's normal for this price range.
The Celticbird's tripod is adequate but not exceptional. It's fine at low and medium power, but you'll notice the wobble if you push magnification with the Barlow. Keep your expectations reasonable and you'll be fine.
The Focuser Problem
Every budget scope has a focuser that wobbles slightly when you touch it. The MEEZAA is better than most, but just touching the focus knob causes the telescope to wobble slightly, making focus difficult, especially when you've got a phone adapter mounted. This is the single most common complaint I see in buyer reviews, and it's not going away at this price point.
The workaround is simple: focus in short bursts, let the scope settle, and check again. It's annoying, but it's manageable.
Phone Adapters and Eyepiece Cameras
The phone adapter is a blessing and a curse. It's the best feature for a lot of beginners, and the aerospace engineering student who got one for Christmas loved it. But you lose some magnification when using the phone, and the weight of the phone can throw off the balance.
If you're serious about astrophotography, don't expect to do hard-core astrophotography with these units. Phone and eyepiece camera snapshots only. Chromatic aberration shows up in photos more than visually, so don't be surprised if your moon shots have a bit of color fringing around the edges.
Finding Things in the Sky
The biggest challenge for beginners isn't magnification, it's finding things. The finder scope is the weak link on every budget telescope. It's inverted, the screws won't hold position, and it's the reason most beginners quit.
My advice: set the finder in daylight. Point the main scope at a distant tree or telephone pole, then adjust the finder until it's centered on the same target. It takes five minutes and it'll save you an hour of frustration at night. And download Stellarium on your phone. It works like a charm for finding stars, and I recommend it to every beginner I meet.
What Else to Consider
The storage king: If you need something that packs away small, look for a scope with a short tube design. The included backpack on some kits is a bonus at this price, and it makes the scope genuinely grab and go.
The budget pick: The Celticbird 80mm is the cheapest scope I'd actually recommend. Below this price point, you're getting toys, not telescopes.
Should You Buy the MEEZAA 90mm?
If you want a telescope that feels solid, assembles in about 20 minutes, and will show you Saturn's rings on your first clear night, yes. The build quality is excellent for the price, everything feels solid, and the fit and finish is competitive with some higher priced options.
Priced within a very small budget, it's the scope I'd hand to someone who wants to see something real without wrestling with equipment.
For what you'd spend on a couple of pizzas, you get a scope that'll last years and show you the craters on the moon, the moons of Jupiter, and the ring of Saturn. That's not a bad trade.
Should You Buy the Celticbird 80mm?
If you're curious about astronomy but not ready to commit serious money, this is the scope to start with. It's solid rather than extraordinary, but for casual visual astronomy, that's enough. The optics will surprise you. The finder scope will frustrate you. Plan for it and you'll be fine.
This is a perfect way to get started, especially for the whole family. The public yearns to look through an eyepiece, and this scope delivers that experience without breaking the bank.
The best telescope is the one you'll actually use. Both of these qualify. Pick the one that fits your budget and get outside on a clear night. The moon isn't going to wait for you.